Polymer allows observing the changes on an element’s properties by taking different actions such as −
- Observers − It invokes the callbacks whenever the data changes.
- Computed Properties − It computes the virtual properties based on other properties, and re-computes them whenever the input data changes.
- Data Bindings − It updates the properties, attributes, or the text content of a DOM node using annotations whenever the data changes.
Data Paths
Path is a string in the data system, that provides a property or a sub-property relative to a scope. The scope can be a host element. Paths can be linked to different elements using data binding. Data change can be moved from one element to another, if the elements are connected with data binding.
Example
<dom-module id = "my-profile">
   <template>
      . . .
      <address-card address="{{myAddress}}"></address-card>
   </template>
   . . .
</dom-module>
The above two paths (my-profile and address-card) can be connected with data binding, if <address-card> is in the local DOM of the <my-profile> element.
Following are the special types of path segments in Polymer.js −
- The wild card (*) character can be used as the last segment in a path.
- The array mutations can be displayed to a given array by placing string splices as the last segment in a path.
- Array item paths indicate an item in an array and the numeric path segment specifies an array index.
In a data path, each path segment is a property name and they include following two kinds of paths −
- The path segments separated by dots. For example: “apple.grapes.orange”.
- In an array of strings, each array element is either a path segment or a dotted path. For example: [“apple”,”grapes”,”orange”], [“apple.grapes”,”orange”].
Data Flow
Example
The following example specifies a two-way binding of data flow. Create an index.html file and add the following code in it.
<!doctype html>
<html>
   <head>
      <title>Polymer Example</title>
      <script src = "bower_components/webcomponentsjs/webcomponents-lite.js"></script>
      <link rel = "import" href = "bower_components/polymer/polymer.html">
      <link rel = "import" href = "my-element.html">
   </head>

   <body>
      <my-element></my-element>
   </body>
</html>
Now create another file called my-element.html and include the following code.
<link rel = "import" href = "bower_components/polymer/polymer-element.html">
<link rel = "import" href = "prop-element.html">

//it specifies the start of an element's local DOM
<dom-module id = "my-element">
   <template>
      <prop-element my-prop="{{demoProp}}"></prop-element>
      <p>
         Present value: <span>{{demoProp}}</span>
      </p>
   </template>

   <script>
      Polymer ({
         is: "my-element", properties: {
            demoProp: String
         }
      });
   </script>
</dom-module>
Next, create one more file called prop-element.html and add the following code.
//it specifies the start of an element's local DOM
<dom-module id = "prop-element">
   <template>
      <button on-click = "onClickFunc">Change value</button>
   </template>

   <script>
      Polymer ({
         is: "prop-element", properties: {
            myProp: {
               type: String,
               notify: true,
               readOnly: true,
               value: 'This is initial value...'
            }
         },
         onClickFunc: function(){
            this._setMyProp('This is new value after clicking the button...');
         }
      });
   </script>
</dom-module>
Output
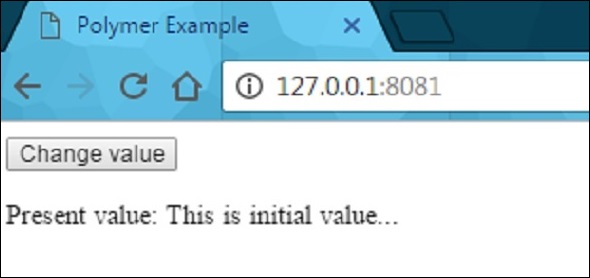
Run the application as shown in the previous chapters, and navigate to http://127.0.0.1:8081/. Following will be the output.

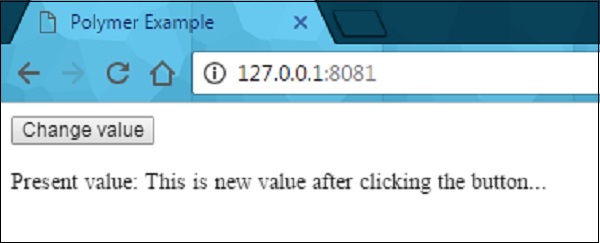
After clicking the button, it will change the value as shown in the following screenshot.

Linking Two Paths
You can link the two paths to the same object using the linkPaths method and need to use data binding to generate changes between the elements.
Example
linkPaths('myTeam', 'players.5');
The path linkage can be removed using the unlinkPaths method as shown below −
unlinkPaths('myTeam');
Observers
The observable changes that occur to the element’s data invoke methods known as observers. Following are the types of observers.
- Simple observers are used to observe a single property.
- Complex observers are used to observe more than one property or path.
Data Binding
Data binding can be used to connect the property or an attribute of an element from the host element in its local DOM. Data binding can be created by adding annotations to DOM template as shown in the following code.
<dom-module id = "myhost-element">
   <template>
      <target-element target-property = "{{myhostProperty}}"></target-element>
   </template>
</dom-module>
The anatomy of data binding in the local DOM template looks like the following −
property-name=annotation-or-compound-binding
or
attribute-name$=annotation-or-compound-binding
The left-hand side of the binding specifies the target property or attribute, while the righthand side of the binding specifies either a binding annotation or a compound binding. The text in binding annotation are enclosed by double curly bracket ({{ }}) or double square bracket ([[ ]]) delimiters and the compound binding includes one or more string literal binding annotations.
Following are the helper elements, which are used with data binding use cases −
- Template Repeater − An instance of the template’s contents can be created for each item in an array.
- Array Selector − It provides the selection state for an array of structured data.
- Conditional Template − You can identify the content, if the condition is true.
- Auto-binding Template − It specifies the data binding outside of polymer element.
The DOM tree triggers a dom-change event, if the helper elements update the DOM tree. Sometimes, you can interact with DOM by changing the model data, not by interacting with the created nodes. Therefore, you can use the dom-change event to access the nodes directly.
Leave a Reply