In this article, we will create a star rating widget with the help of Bootstrap. In the beginning, we will learn some basic meanings of the bootstrap rating widget. After that, we will learn how to implement a bootstrap rating widget with the help of some examples.
What do you mean by the Bootstrap rating widget?
Bootstrap star rating widget can allow the users to share their opinion about the product, documentation page, photo, and many more. It is a technique to show the user’s response or feedback to any product or service.
Example 1:
<! DOCTYPE html>

<html>

<head>

<meta name="viewport" content="width=device-width, initial-scale=1">

<meta charset="UTF-8">

<title>  Bootstrap Rating widget

</title>

<link href="https://maxcdn.bootstrapcdn.com/bootstrap/4.0.0-alpha.6/css/bootstrap.min.css" rel="stylesheet" integrity="sha384-rwoIResjU2yc3z8GV/NPeZWAv56rSmLldC3R/AZzGRnGxQQKnKkoFVhFQhNUwEyJ" crossorigin="anonymous">

<link rel="stylesheet" href="https://cdnjs.cloudflare.com/ajax/libs/font-awesome/4.7.0/css/font-awesome.min.css">

<style>

fieldset

 {

margin: 0;

 padding: 0;

}

label {

margin: 0;

padding: 0;

}

body {

 margin: 20px;

align: center;

}

h1 {

font-size: 1.5em;

margin: 10px;

 }

/***** Style Star Rating Widget *****/

.rating {

  border: none;

  float: left;

  text-align: center;

}

h1 {

  position: relative;

  padding: 0;

  margin: 10;

  font-family: "Raleway", sans-serif;

  font-weight: 300;

  font-size: 40px;

  color: #080808;

  -webkit-transition: all 0.4s ease 0s;

  -o-transition: all 0.4s ease 0s;

  transition: all 0.4s ease 0s;

}

h2 {

  position: relative;

  padding: 0;

  margin: 10;

  font-family: "Raleway", sans-serif;

  font-weight: 300;

  font-size: 40px;

  color: #080808;

  -webkit-transition: all 0.4s ease 0s;

  -o-transition: all 0.4s ease 0s;

  transition: all 0.4s ease 0s;

}

.rating > input {

display: none;

text-align: center;

}

.rating > label:before {

  margin: 5px;

  font-size: 2.25em;

  font-family: FontAwesome;

  display: inline-block;

  content: "\f005";

}

.rating > .half:before {

  content: "\f089";

  position: absolute;

}

.rating > label {

  color: #ddd;

 float: right;

}

/***** CSS Magic to Highlight Stars on Hover *****/

.rating > input:checked ~ label { color: #FFD700;  }

.rating:not(:checked) > label:hover { color: #FFD700;  }

.rating:not(:checked) > label:hover ~ label { color: #FFD700;  }

.rating > input:checked + label:hover { color: #FFED85;  }

.rating > input:checked ~ label:hover { color: #FFED85;  }

 .rating > label:hover ~ input:checked ~ label { color: #FFED85;  }

.rating > input:checked ~ label:hover ~ label { color: #FFED85;  }

</style>

<body>

<h1> Example: </h1>

<fieldset class="rating" align="center">

    <input type="radio" id="star5" name="rating" value="5" />

<label class = "full" for="star5" title="Awesome - 5 stars">

</label>

    <input type="radio" id="star4half" name="rating" value="4 and a half" />

<label class="half" for="star4half" title="Pretty good - 4.5 stars">

</label>

    <input type="radio" id="star4" name="rating" value="4" />

<label class = "full" for="star4" title="Pretty good - 4 stars">

</label>

    <input type="radio" id="star3half" name="rating" value="3 and a half" />

    <label class="half" for="star3half" title="Meh - 3.5 stars">

</label>

    <input type="radio" id="star3" name="rating" value="3" />

<label class = "full" for="star3" title="Meh - 3 stars">

</label>

    <input type="radio" id="star2half" name="rating" value="2 and a half" />

<label class="half" for="star2half" title="Kinda bad - 2.5 stars">

</label>

    <input type="radio" id="star2" name="rating" value="2" />

<label class = "full" for="star2" title="Kinda bad - 2 stars">

</label>

    <input type="radio" id="star1half" name="rating" value="1 and a half" />

<label class="half" for="star1half" title="Meh - 1.5 stars">

</label>

    <input type="radio" id="star1" name="rating" value="1" />

<label class = "full" for="star1" title="Sucks big time - 1 star">

</label>

    <input type="radio" id="starhalf" name="rating" value="half" />

<label class="half" for="starhalf" title="Sucks big time - 0.5 stars">

</label>

</fieldset>

</body>

</html>
Explanation:
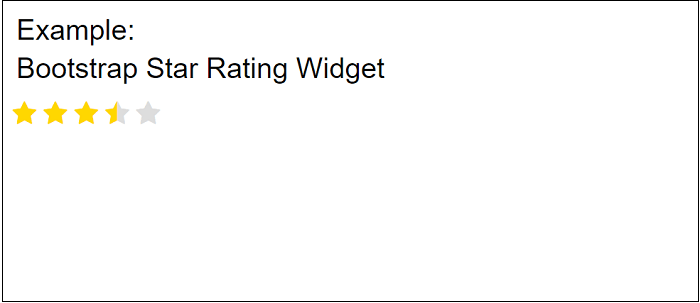
In the above example, we have created a star rating widget with the help of Bootstrap. We can add a class to the input field [input class=”rating”]. And this will automatically add star ratings. When we click on the start or hover on the star, the star is selected.
Output:
Following is the output of this example:

Example 2:
<! DOCTYPE html>

<html>

<head>

<title>  Bootstrap Rating widget

</title>

<meta name="viewport" content="width=device-width, initial-scale=1">

<link href="https://maxcdn.bootstrapcdn.com/bootstrap/4.0.0-alpha.6/css/bootstrap.min.css" rel="stylesheet" integrity="sha384-rwoIResjU2yc3z8GV/NPeZWAv56rSmLldC3R/AZzGRnGxQQKnKkoFVhFQhNUwEyJ" crossorigin="anonymous">

<link rel="stylesheet" href="https://cdnjs.cloudflare.com/ajax/libs/font-awesome/4.7.0/css/font-awesome.min.css">

<style>

h1[alt="Simple"] {

color: white;

}

a[href]

{

color: grey;

font-size: 0.5em;

text-decoration: none

}

a[href]:hover {

color: grey;

font-size: 0.5em;

text-decoration: none

}

body

{

  background: #4a4a4c !important;

}

.starrating > input {

display: none;

}  /* Remove radio buttons */

.starrating > label:before {

  content: "\f005"; /* Star */

  margin: 2px;

  font-size: 8em;

  font-family: FontAwesome;

  display: inline-block;

}

.starrating > label

{

  color: #222222; /* Start color when not clicked */

}

.starrating > input:checked ~ label

{ color: #ffca08 ; } /* Set yellow color when star checked */

.starrating > input:hover ~ label

{ color: #ffca08 ;  }

h2 {

  position: relative;

  padding: 0;

  margin: 10;

  font-family: "Raleway", sans-serif;

  font-weight: 300;

  font-size: 40px;

  color: white;

  -webkit-transition: all 0.4s ease 0s;

  -o-transition: all 0.4s ease 0s;

  transition: all 0.4s ease 0s;

}

p {

  position: relative;

  padding: 0;

  margin: 20;

  font-family: "Raleway", sans-serif;

  font-weight: 100;

  font-size: 20px;

  color: black;

  -webkit-transition: all 0.4s ease 0s;

  -o-transition: all 0.4s ease 0s;

  transition: all 0.4s ease 0s;

}

</style>

</head>

<body>

<h2 class="text-center" alt="Simple"> Example: </h2>

<h1 class="text-center" alt="Simple"> Bootstrap Star Rating Widget </h1>

<div class="container">

        <div class="starrating risingstar d-flex justify-content-center flex-row-reverse">

            <input type="radio" id="star5" name="rating" value="" /> <label for="star5" title="5 star"> 5 </label>

            <input type="radio" id="star4" name="rating" value="4" /> <label for="star4" title="4 star"> 4 </label>

            <input type="radio" id="star3" name="rating" value="3" /> <label for="star3" title="3 star"> 3 </label>

            <input type="radio" id="star2" name="rating" value="2" /> <label for="star2" title="2 star"> 2 </label>

            <input type="radio" id="star1" name="rating" value="1" /> <label for="star1" title="1 star"> </label>

        </div>

  </div>

</body>

</html>
Explanation:
In the above example, we have created a star rating widget with the help of Bootstrap. We can add a class to the input field [input class=”rating”]. And this will automatically add star ratings. When we click on the start or hover on the star, the star is selected.
Output:
Following is the output of this example:

Example 3:
<! DOCTYPE html>

<html lang="en" >

<head>

  <meta charset="UTF-8">

  <title> Bootstrap Star Rating </title>

  <link href='https://fonts.googleapis.com/css?family=Lobster' rel='stylesheet' type='text/css'>

<meta name="viewport" content="width=device-width, initial-scale=1">

  </head>

<style>

body h1 {

  font-family: 'Lobster', cursive;

  margin: 50px 20px 40px;

  font-size: 50px;

  letter-spacing: 0.5px;

  color: #999999;

  text-align: center;

}

.rating {

  width: 208px;

  height: 40px;

  margin: 0 auto;

  padding: 40px 50px;

  border: 1px solid #CCCCCC;

  background: #F9F9F9;

}

.rating label {

  float: right;

  position: relative;

  width: 40px;

  height: 40px;

  cursor: pointer;

}

.rating label:not(:first-of-type) {

  padding-right: 2px;

}

.rating label:before {

  content: "\2605";

  font-size: 42px;

  color: #CCCCCC;

  line-height: 1;

}

.rating input {

  display: none;

}

.rating input:checked ~ label:before

{

 color: #F9DF4A;

}

.rating:not(:checked) > label:hover ~ label:before {

  color: #F9DF4A;

}

.rating:not(:checked) > label:hover:before {

 color: #F9DF4A;

}

body {

  align-items: center;

  background-color: rgba(201, 76, 76, 0.3);

  display: flex;

  flex-flow: column nowrap;

  height: 100vh;

  justify-content: center;

  width: 100%;

}

p {

  color: #333;

  font-family: 'segoe ui', sans-serif;

  font-size: 24pt;

  transition: transform .5s ease;

}

p:hover {

  transform: scale(1.5, 1.5);

}

rating label {

  color: lightgray;

  display: inline-block;

  font-size: 22pt;

  margin: 0 -2px;

  transition: transform .15s ease;

}

.rating label:hover {

  transform: scale(1.35, 1.35);

}

</style>

<body>

<h1> Example </h1>

  <p> Boostrap Star Rating widget </p>

<div class="rating">

    <input type="radio" id="star5" name="rating" value="5" />

    <label for="star5">

    </label>

    <input type="radio" id="star4" name="rating" value="4" />

    <label for="star4"></label>

    <input type="radio" id="star3" name="rating" value="3" />

    <label for="star3">

    </label>

    <input type="radio" id="star2" name="rating" value="2" />

    <label for="star2">

    </label>

    <input type="radio" id="star1" name="rating" value="1" />

    <label for="star1">

    </label>

</div>

</body>

</html>
Explanation:
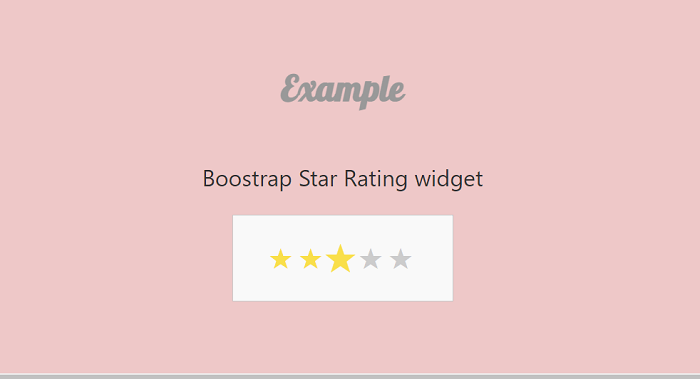
In the above example, we have created a star rating widget with the help of Bootstrap. We can add a class to the input field [input class=”rating”]. And this will automatically add star ratings. When we click on the start or hover on the star, the star is selected.
Output:
Following is the output of this example:

Leave a Reply