First, we need to create a feature directory. We add all feature files into this folder.
Feature files should be written with Gherkin Syntax (Given-When-Then). Gherkin, a domain-specific language (DSL) that “lets you describe the software’s behavior without detailing how that behavior is implemented.”
Each scenario can have up to three parts: Given, When, and Then:
- Given – Given lines describe what pre-condition should exist.
- When – When lines describe the actions you take.
- Then – Then lines describe the result.
There are also And lines, which do whatever the line above them does. For example:
Given I am on the product page
And I am logged in
Then I should see “Welcome!”
And I should see “Personal Details”
In this case, the first And line act as a Given line, and the second one acts as a Then line.
Go into the features folder and create test.feature file. Our test scenario is:
- Go to www.google.co.uk
- Search yahoo
- See the yahoo in search results
- Click the yahoo link
- Wait 10 seconds
Now, open test.features file with notepad++ or another text editor and write the above test scenario as Gherkin syntax.
Feature: Find the Yahoo Website
Scenario: Search a website in google
Given I am on the Google homepage
When I will search for “yahoo”
Then I should see “yahoo”
Then I will click the yahoo link
Then I will wait for 10 seconds
It is better to use fewer Given-When-Then statements in order not to create Given-When-Then Hell. In the above code, three Then statements are not a good Gherkin standard. You can try to merge them single Then statement. The last two Then statements are normally not necessary, I have added them for demonstration purposes.
Given: You can use this for data preparation and test prerequisite operations.
When: This is the action. You can do the actions with the When keyword.
Then: Then is generally using for verifications and assertions.
The below pattern is a good Gherkin Pattern.
Feature: Find the Yahoo Website Scenario: Search a website in google
Given I am on the Google homepage
When I will search for “yahoo”
Then I should see “yahoo”
After writing the feature file try to run the test with the below command.
cucumber features\test.feature
We haven’t defined the test steps yet. Thus, we will get the below result after test execution.
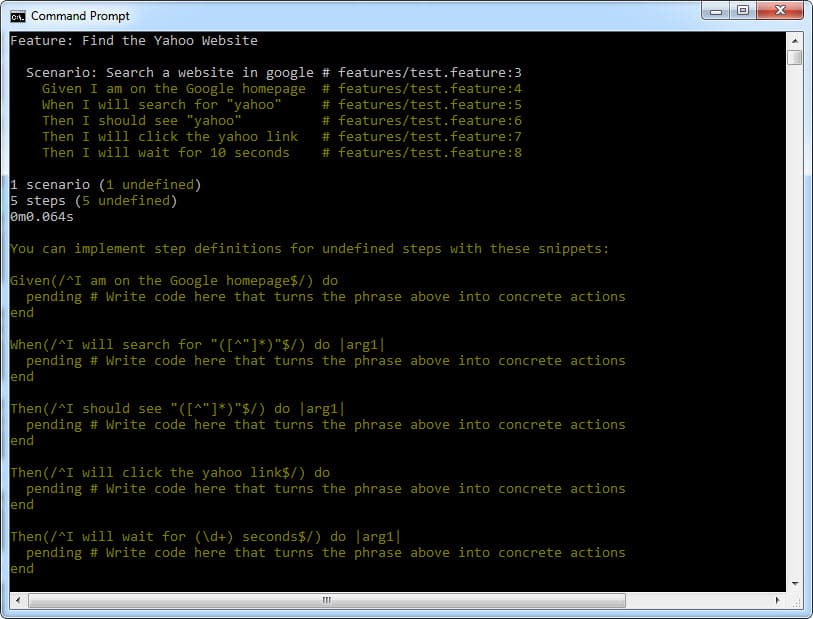
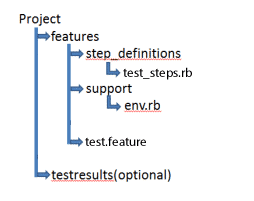
In order to prepare the step definition file, first, create a folder as step_definitions in the features folder and then create test_steps.rb file. The directory structure should be like that:
You can copy the code snippets of the test result and paste them into test_steps.rb file. Now, we can write the test steps. I want to show you how to do it, step by step.
Step-1: First, we need to navigate to google.co.uk website. Capybara provides visit method for this function. In Selenium, we can do this with driver.get() or driver.navigate().to() methods. So, we should add the below line to go google.co.uk.
visit ‘http://www.google.co.uk’
Step-2: After the above operation, we are on google.co.uk page, now it is time to write the search text into the search bar. As shown below figure, the search bar’s id is “lst-ib”.
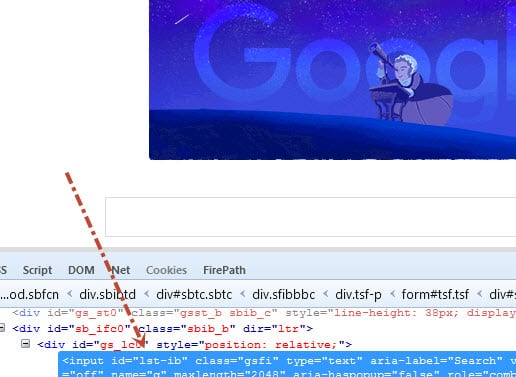
Capybara provides us fill_in method for text entrance operations. We can do this operation with the below line. In Selenium, we can do this with textElement.sendKeys(String) method.
fill_in ‘lst-ib’, :with => searchText
Step-3: Then, we need to check expected search results on the current page. To do this we can use the page.should have_content method. In Selenium, we can do this with JUnit, TestNG, or Hamcrest assertions. For example, assertThat(element.getText(), containsString(“yahoo”));
page.should have_content(expectedText)
Step-4: Then, it is time to click the yahoo link. As shown below figure link text is “yahoo”.
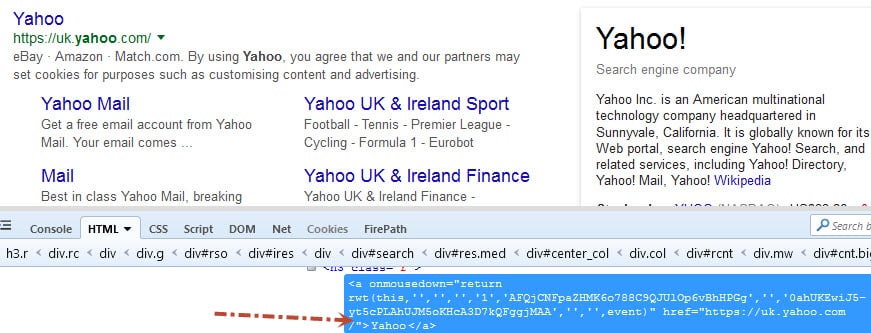
In Capybara, we can use click_link method to do this. In Selenium, we can do this with driver.findElement(By.linkText(“Yahoo”));
click_link(‘Yahoo’)
Step-5: At the last step, we will wait for 10 seconds statically to see the yahoo website. To do this, we can use sleep(10) method. In Selenium, we use Thread.sleep(10000);
Now, it is time to put them together. Our test_steps.rb code is shown below.
#Navigate to google.co.uk
Given(/^I am on the Google homepage$/) do
visit ‘https://www.google.co.uk/’
end
#Write “yahoo” search text to the search bar
When(/^I will search for “([^”]*)”$/) do |searchText|
fill_in ‘lst-ib’, :with => searchText
end
#In the current page, we should see “yahoo” text
Then(/^I should see “([^”]*)”$/) do |expectedText|
page.should have_content(expectedText)
end
#Click the yahoo link
Then(/^I will click the yahoo link$/) do
click_link(‘Yahoo’)
end
#Wait 10 seconds statically to see yahoo website
Then(/^I will wait for (\d+) seconds$/) do |waitTime|
sleep (waitTime.to_i)
end
After writing step definitions, create a support folder into the features folder and create a env.rb file for environmental setups. Then, just copy and paste below environmental setup into that file and save it. I got this setup from reference-3.
require ‘rubygems’
require ‘capybara’
require ‘capybara/dsl’
require ‘rspec’
Capybara.run_server = false
#Set default driver as Selenium
Capybara.default_driver = :selenium
#Set default selector as css
Capybara.default_selector = :css
#Syncronization related settings
module Helpers
def without_resynchronize
page.driver.options[:resynchronize] = false
yield
page.driver.options[:resynchronize] = true
end
end
World(Capybara::DSL, Helpers)
And Finally, we are ready to run our feature file. First, go to your project directory. It contains a features folder as shown below.
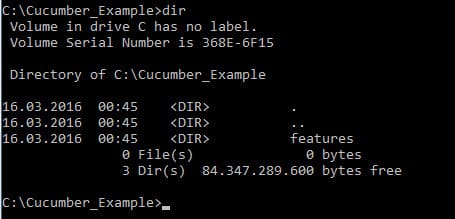
Then, run the below command.
cucumber features\test.feature

Leave a Reply